
Creating a website within a one-hour time frame may seem like a daunting task, but with the right tools and approach, it’s entirely achievable. In this quick website building guide, we’ll show you how to set up a functional and attractive website in no time, all without the need for any coding skills. This approach is perfect for those who want a fast and simple site setup without the technical intricacies that often come with web development.
When you’re aiming for How To Build A Website In 1 Hour, it’s crucial to streamline the process. We’ll be using WordPress.com, a user-friendly platform, to help us achieve this goal. WordPress.com simplifies website creation, enabling users to focus on content and design rather than the technical aspects of website development.
By following this step-by-step guide, you’ll be able to create a website that’s not only functional but also visually appealing. So, whether you need a personal blog, a portfolio site, or a small business website, this no-coding 1-hour website creation guide will help you launch your online presence quickly and effortlessly.
Creating a website using the Astra theme and WordPress in 1hour
Setting up Your Website with Webtoils - Buying a Domain and Hosting
Creating a professional website is a pivotal step for establishing your online presence, and selecting the right domain and hosting services is the foundation of your web project. In this guide, we’ll walk you through the process of buying a domain and hosting for your website using the fictional example of “Webtoils.” Whether you’re launching a personal blog, an e-commerce store, or a business website, the steps outlined below will help you get started quickly and efficiently.
Step 1: Choose a Domain Name
Selecting a domain name is the first and most crucial step in creating your online identity. It’s the web address that your visitors will use to find your site. For instance, if your website is about web design and development services, you might choose a domain name like “Webtoils.com” if it’s available.
Step 2: Find a Reliable Hosting Provider
Choosing the right hosting provider is essential for the performance and security of your website. Consider the following reputable hosting companies:
Bluehost: Known for its wide range of hosting options and official WordPress recommendation.
SiteGround: Renowned for its excellent customer support and fast loading times.
HostGator: Offers user-friendly hosting solutions with competitive pricing.
A2 Hosting: Focuses on speed and performance, making it ideal for web developers.
DreamHost: Offers diverse hosting solutions, including managed WordPress hosting.
GoDaddy: A well-known provider with a variety of hosting and domain services, ideal for small businesses.
Hostinger: Offers affordable hosting with a focus on speed and scalability, suitable for budget-conscious users.
Namecheap: Known for domain registration, but they also offer reliable hosting services with a commitment to customer privacy.
Step 3: Purchase a Hosting Plan
Once you’ve decided on a hosting provider, visit their website and select a hosting plan that aligns with your website’s needs. Hosting plans range from shared hosting (cost-effective but with resource limitations) to dedicated hosting (providing more resources and control but at a higher cost).
Step 4: Register Your Domain
Many hosting providers offer domain registration as part of their hosting packages, simplifying the process. During the sign-up process, you’ll have the option to register your chosen domain. Typically, this service is offered free or at a discounted rate for the first year, with an annual fee for domain renewal.
Step 5: Complete the Purchase
Follow the steps provided by your chosen hosting provider to complete the purchase of your hosting plan and domain. This will involve creating an account, entering payment information, and selecting any additional services like domain privacy protection.
Step 6: Website Building
After purchasing your hosting plan and domain, you can proceed to build your website. Install WordPress, select a suitable theme, and start customizing your site to match your unique needs and style.
By following these steps, you’ll be well on your way to launching a professional website with a solid foundation provided by Webtoils. Remember that your choice of hosting provider plays a critical role in your website’s performance and security, so conduct thorough research and read reviews before making your decision.
Setting up Hosting and Installing WordPress with Webtoils
In the journey of establishing your website with Webtoils, the next crucial steps involve setting up hosting and installing WordPress. Hosting provides a home for your website on the internet, while WordPress serves as the platform to build and manage your site. This guide will walk you through these steps, ensuring a strong foundation for your web project. Let’s get started:
Set Up Hosting and Install WordPress
Login to Your Hosting Account: Begin by logging into your hosting account using the credentials provided when you signed up with your hosting provider.
Access Your Hosting Control Panel: Once logged in, you’ll access your hosting control panel. This control panel may vary depending on your hosting provider. Look for an option to manage your websites or domains.
Locate the Website or Domain Section: In your control panel, navigate to the section related to websites or domains. The label may differ among hosting providers.
Add a New Domain or Website: In this section, you’ll often find an option to add a new website or domain. Select this option to begin the setup.
Choose Domain and Directory: Choose the domain you’ve registered (e.g., “webtoils.com”) and specify the directory where your website’s files will be stored. You can usually leave this field blank or set it as “/public_html” if it’s not already configured.
Install WordPress: Many hosting providers offer one-click WordPress installation options through tools like “Auto Installer,” “Softaculous,” or “QuickInstall.” Look for the WordPress icon or link.
Complete WordPress Setup: You’ll be guided through the WordPress setup process. You’ll need to provide:
- Site Title: Enter your website or blog’s name (e.g., “Webtoils“).
- Username and Password: Create a secure username and password for your WordPress admin account. Keep these credentials secure for future logins.
- Email Address: Enter a valid email address for receiving notifications and updates.
- Choose Language: Select your preferred language for your WordPress installation.
Install WordPress: After filling in the required information, click the “Install” or “Submit” button to initiate the WordPress installation. You’ll receive a confirmation message when it’s completed.
Access Your WordPress Dashboard: With WordPress installed, you’ll be provided a link to your WordPress dashboard (often labeled as “wp-admin”). Click on this link and log in using the username and password you created during setup.
Explore Your WordPress Dashboard: Congratulations, you’ve successfully installed WordPress. You can now delve into your WordPress dashboard to customize your website, add themes, plugins, and start creating content.
These steps set up the hosting and install WordPress, putting you on the path to creating a dynamic and engaging website with Webtoils. As you explore your WordPress dashboard, you’ll find a wealth of features and options to personalize your site to your liking.
Installing the Astra Theme for Your Website with Webtoils

The choice of a theme is a pivotal moment in the process of creating your website with Webtoils. Themes define the visual identity of your site, and the Astra theme is an excellent choice known for its flexibility and user-friendly features. In this section, we’ll guide you through the process of installing the Astra theme on your WordPress website. Let’s get started:
Step 3: Install the Astra Theme
Login to Your WordPress Dashboard: To begin, access your WordPress dashboard. This is where you manage and configure your website. You can log in by adding “/wp-admin” to your domain, for instance, “example.com/wp-admin.” Use the username and password you created during the WordPress setup.
Access the Theme Section: Upon logging in, you’ll find yourself on the WordPress dashboard. In the left-hand menu, locate and click on “Appearance.” This opens a submenu dedicated to appearance-related settings.
Choose “Themes”: Within the “Appearance” submenu, select “Themes.” This is the section where you can manage and install themes for your website.
Add New Theme: In the themes section, look for the “Add New” button and click on it. This option allows you to search and install themes directly from the WordPress theme repository.
Search for the Astra Theme: At the top right of the themes page, you’ll see a search bar. Type “Astra” in this search box and press “Enter.” This initiates a search for the Astra theme in the WordPress theme repository.
Install Astra Theme: Among the search results, find the Astra theme. You’ll notice an “Install” button below the Astra theme’s thumbnail. Click on this button to begin the installation.
Activate the Theme: After the Astra theme has been successfully installed, you’ll see an “Activate” button. Click on it to make the Astra theme the active theme for your website.
Customize the Astra Theme: With the Astra theme now activated, you can commence customization to match your website’s style and requirements. You can adjust colors, typography, layout, and other design elements using the WordPress Customizer, which can be accessed through “Appearance” > “Customize.”
The Astra theme provides you with the tools to create a unique and professional look for your website. It’s designed to be user-friendly and versatile, making it an ideal choice for web projects of all kinds. With the Astra theme, you’ll be well-equipped to build an attractive and functional site with Webtoils.
Installing Required Plugins for Your Website with Webtoils
Adding the right plugins to your website can enhance its functionality and features. For your Webtoils website, we’ll focus on essential plugins like Elementor, ElementKit, WPForms, and LiteSpeed Cache. These plugins will help you design and build your site, add forms, and optimize its performance. Let’s proceed with installing these required plugins:
Step 4: Install Required Plugins
Access Your WordPress Dashboard: Begin by logging in to your WordPress dashboard. You can do this by adding “/wp-admin” to your domain, such as “example.com/wp-admin.” Use your WordPress username and password to log in.
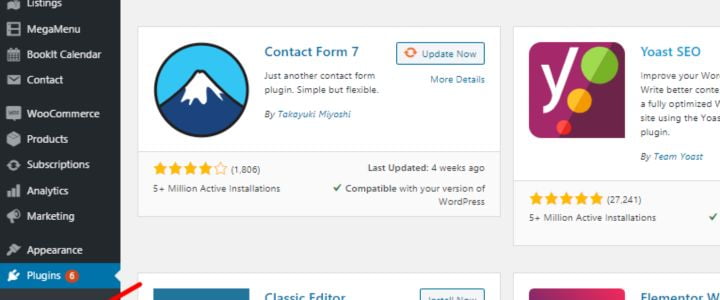
Navigate to the Plugin Section: On the WordPress dashboard, locate “Plugins” in the left-hand menu. Click on this option to access the plugin management section.
Add New Plugins: In the plugin section, you’ll find an “Add New” button. Click on this button to start searching and installing new plugins.
Search for Elementor: In the search bar at the top-right of the plugins page, type “Elementor” and press “Enter.” Elementor is a powerful page builder that will assist you in creating and designing your website’s pages.
Install Elementor: Once Elementor appears in the search results, you’ll notice an “Install Now” button below its name. Click on this button to initiate the installation.
Activate Elementor: After successful installation, an “Activate” button will appear. Click on it to activate the Elementor plugin.
Repeat the Process for ElementKit, WPForms, and LiteSpeed Cache: To install ElementKit, WPForms, and LiteSpeed Cache, follow the same steps: search, install, and activate each plugin.
Configure Each Plugin: After activating each plugin, you may be prompted to configure its settings. Follow the on-screen instructions for each plugin to set them up according to your preferences.
These required plugins are powerful tools for your website. Elementor and ElementKit will empower you with an intuitive visual page builder, WPForms will allow you to create forms and capture user data, and LiteSpeed Cache will optimize your website’s performance for a smoother user experience.
Creating a Home Page with the Astra Theme

Your website’s homepage is often the first impression visitors have of your online presence, and creating an engaging and visually appealing home page is vital. In this section, we will focus on designing an impressive home page for your website with the help of the Astra theme, Elementor, ElementKit, and WPForms.
Designing an attractive and functional home page is a significant step in establishing your website’s identity and purpose. In this step, we’ll guide you through the process of crafting a captivating home page that not only captures your visitors’ attention but also effectively conveys your website’s content and objectives.
1. Creating a Menu
Access WordPress Dashboard: Log in to your WordPress dashboard.
Navigate to Menu Section: Go to “Appearance” > “Menus.”
Create a New Menu: If needed, create a new menu and give it a name.
Add Menu Items: Add pages, posts, custom links, or categories as menu items.
Organize and Customize: Rearrange and customize menu items by dragging, dropping, and editing labels and links.
Assign Menu Location: Choose where you want the menu to appear on your site, like the “Primary Menu” or “Header Menu.”
Save Your Menu: Save your menu to preserve changes.
Preview Your Menu: Review how the menu looks on your site.
Optional Customization: Explore additional menu customization options in “Appearance” > “Customize.”
A well-structured menu is crucial for effective navigation and user experience on your website, helping visitors easily access the content they’re looking for.
2. Creating Header and Footer with ElementKit
In this step, we will use ElementKit to design and customize the header and footer sections of your website. The header and footer are essential components of your site’s layout, contributing to its overall design and navigation. ElementKit simplifies the process of creating these sections. Here’s how to get started:
Access Your WordPress Dashboard: Begin by logging in to your WordPress dashboard using your credentials.
Install ElementKit (if not already installed): If you haven’t already installed ElementKit, you can do so by going to “Plugins” in the left-hand menu and clicking on “Add New.” Search for “ElementKit,” then click “Install” and “Activate.”
Navigate to ElementKit: After installation, you’ll find a new ElementKit menu in your WordPress dashboard. Click on “ElementKit” to access its features.
Create or Edit a Header: Within ElementKit, you can create or edit a header. Headers typically contain elements like the site logo, navigation menu, and contact information. Customize the header layout, add or rearrange elements, and adjust styling options to match your site’s branding.
Create or Edit a Footer: Similarly, you can create or edit a footer using ElementKit. Footers often include copyright information, links to important pages, and social media icons. Tailor the footer’s content, layout, and design according to your website’s needs.
Save and Publish: After customizing your header and footer, be sure to save your changes. You can also preview how they appear on your site.
Assign Header and Footer: In ElementKit, you can assign your custom header and footer to specific pages or sections of your website. You can also set default headers and footers for your entire site.
Testing: Finally, it’s a good practice to test your header and footer on various devices and screen sizes to ensure they display correctly and maintain a consistent user experience.
Customizing your header and footer with ElementKit allows you to create a cohesive and professional design for your website. These sections are crucial for branding and navigation, and ElementKit simplifies the process of tailoring them to your specific requirements.
3. Creating Your Home Page with Elementor
The home page is the centerpiece of your website, often the first page visitors encounter. It’s essential to make it engaging, informative, and visually appealing. Elementor, a powerful drag-and-drop page builder, will help you design your home page with ease. Here’s how to create an impressive home page:
Access Your WordPress Dashboard: Begin by logging in to your WordPress dashboard using your credentials.
Install Elementor (if not already installed): If Elementor is not already installed, you can do so by going to “Plugins” in the left-hand menu, clicking “Add New,” searching for “Elementor,” and then clicking “Install” and “Activate.”
Create a New Page: In the WordPress dashboard, navigate to “Pages” in the left-hand menu and click “Add New.” Give your new page a title, such as “Home.”
Edit with Elementor: In the page editor, you’ll notice an “Edit with Elementor” button. Click on it to launch the Elementor page builder.
Design Your Home Page: Elementor offers a user-friendly, drag-and-drop interface. You can add and customize various elements like text, images, videos, buttons, and more. Experiment with different layouts, columns, and sections to create a visually appealing home page.
Add Widgets: Elementor provides widgets that allow you to add functionality and style to your page. Explore widgets for headings, images, icons, forms, and more. Simply drag and drop widgets onto your page and customize them as needed.
Use Templates (Optional): Elementor offers pre-designed templates that can jumpstart your design process. You can access and import templates to save time and get design inspiration.
Save Your Work: Make sure to save your progress as you go. Elementor automatically saves your work, but it’s a good practice to save manually as well.
Preview Your Home Page: Before publishing, click “Preview” to see how your home page looks. Ensure that it’s visually appealing and functions as intended.
Publish Your Home Page: Once you’re satisfied with your home page design, click “Publish” to make it live on your website. Visitors will now see this home page when they land on your site.
Creating your home page with Elementor gives you complete creative control. You can design a page that reflects your brand, provides essential information, and engages your audience. Elementor’s intuitive interface and extensive widget library make the design process both straightforward and versatile.
4. Creating a Contact Form with WPForms
A contact form is a valuable addition to your website, allowing visitors to reach out, ask questions, or provide feedback. WPForms simplifies the process of creating and managing contact forms. Here’s how to set up a contact form on your website:
Access Your WordPress Dashboard: Start by logging in to your WordPress dashboard using your credentials.
Install WPForms (if not already installed): If WPForms is not installed, you can add it by going to “Plugins” in the left-hand menu, clicking “Add New,” searching for “WPForms,” and then clicking “Install” and “Activate.”
Create a New Form: In your WordPress dashboard, find “WPForms” in the left-hand menu and click on it. Then, click “Add New” to create a new form.
Choose a Template: WPForms provides various templates to get you started. Select the “Simple Contact Form” or a template that suits your needs.
Customize Your Form: WPForms offers a drag-and-drop builder for easy customization. You can add, remove, and rearrange fields to match your contact form’s purpose. Common fields include name, email, subject, and message.
Configure Form Settings: Click on “Settings” to configure your form’s settings. You can set up email notifications to receive messages from the form, adjust confirmation messages, and more.
Add the Form to a Page: Once your form is designed and configured, save it. Then, create a new page (or edit an existing one) where you want the contact form to appear.
Edit the Page with Elementor: If your home page was designed with Elementor, click “Edit with Elementor” to open the Elementor editor.
Add WPForms Widget: In Elementor, you can add the WPForms widget to your page. Drag it to the section where you want the form to appear.
Select the Form: In the WPForms widget settings, select the form you created earlier.
Preview and Publish: Click “Preview” to ensure the form appears correctly. Once satisfied, click “Update” to save the changes and make the form live on your page.
Your website now includes a contact form that makes it easy for visitors to get in touch. WPForms offers flexibility and ease of use, allowing you to customize your form to fit your specific requirements. By integrating WPForms with Elementor, you can seamlessly place your contact form on any page of your website, including your home page.
Conclusion
Building your website with Webtoils has been a streamlined and rewarding journey. You’ve established a strong foundation by purchasing domain and hosting services, installed WordPress, and customized your site with the versatile Astra theme. Essential plugins like Elementor, ElementKit, WPForms, and LiteSpeed Cache have enhanced your website’s functionality. You’ve also crafted an engaging home page with Elementor, designed to captivate your audience’s attention. To facilitate communication with your visitors, you’ve integrated a user-friendly contact form using WPForms. These steps have not only laid the groundwork for your online presence but have also armed you with the tools to expand and elevate your website further. As you continue to shape your website’s content and features, you’re on the path to online success with Webtoils. The possibilities are endless, and your digital vision is within reach. Best of luck with your web project!
